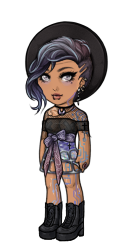
In this tutorial, I will show you how to upload your avatars to Style File. UNFORTUNATELY, Upload from URL is currently broken and we don't have the tools to fix or remove it. So please upload as follows!
Uploading from Your Computer
This method is useful if you wish to upload multiple styles at once, or if you prefer to keep copies of your avatars on your computer. If you use this method, it is very important that you save your avatars correctly before you upload them to Style File. If you upload incorrectly saved avatars to Style File, a moderator will remove them and you will receive a warning. Please note that avatars which aren't saved correctly cannot be fixed if they no longer exist in your Subeta wardrobe.
- Why is it important to save my avatars correctly?

Notice the black background and the grainy appearance. Avatars that look something like this are the result of not saving properly. Avoid this by never saving your avatar in a program like MS Paint, and never save it as any file type other than .PNG.
Note: Since the addition of "White Out" to the wardrobe, avatars are allowed to be uploaded with the white background that the item gives the avatar. However, avatars with "White Out" must still be saved and uploaded in the correct way, which is outlined in this tutorial.
Step One: Save the Avatar
- Locate the avatar you wish to save. Just as in Method One, you must save the actual image of your avatar, which can be found in various places around Subeta, such as on your profile or next to your forum posts. In the screen shot below, I am saving the avatar from the Wardrobe's main page (do not save from the Clothing page where you dress your avatar).
Once you have the avatar, right click on it (Windows users) or press Control and click on it (Mac users). You will see a menu. Choose "Save Image As..."

- Now we will actually save your image. Give the image a unique file name. Make sure "Save as type" is set to .PNG, or your avatar might save with a black background. You'll also need to choose a location to save the image. You can save it to the Desktop or a folder where you will be able to find it easily. In this tutorial I have saved my image in a folder called "Tutorial Images."

Step Two: Upload to Style File
- Head on over to the Style File upload form. Because we saved the avatar to our computer, we will be uploading from a file. Click "Browse..." and locate the avatar that we just saved.

- Follow the same steps as in Method One to give your avatar a title, description, and tags. When you're finished, click "Submit" to upload your avatar to Style File.

Resources
Thank you for taking the time to read this tutorial. I hope it has helped you learn how to save and upload your avatars to Style File. If you need additional help, please visit this topic. You may also wish to read Dublin's General Style File Tutorial for more information.

